Multi Credit Moneylender System User Guide
System Login
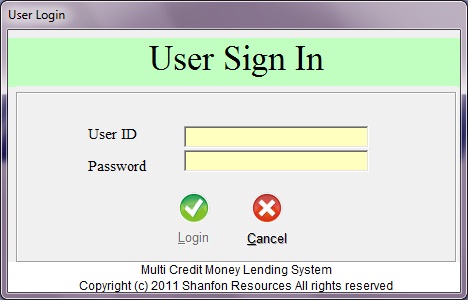
- Key in given User ID and password.
- Click
 Button to login.
- Click
 button to abort.
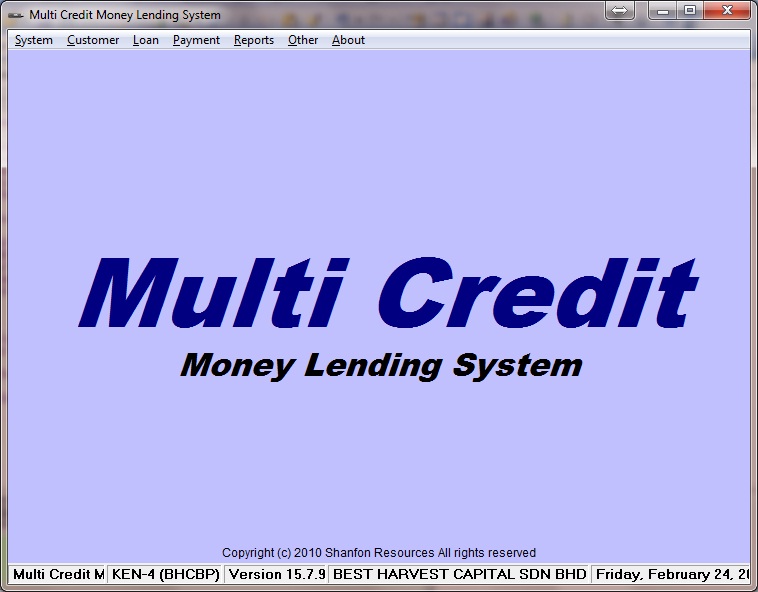
System Main Screen
- System - User Logout to quit to
system
- Customer - Input
Customer Profiles,
Check IC, and
Buy Gold
- Loan -
Input Loans Record, Close loan, open
loan and Delete Loan
- Payment -
Input Payment Record, Delete Payment
- Report -
Main Report, Transaction Report, Analysis Report and
Easy Report
- Other -
Follow Up,
Expenses, Sell Gold, Loan Summary,
Change User Password
Multi Credit Moneylender System User Guide
Customer Profile
To create new
Customer Profile
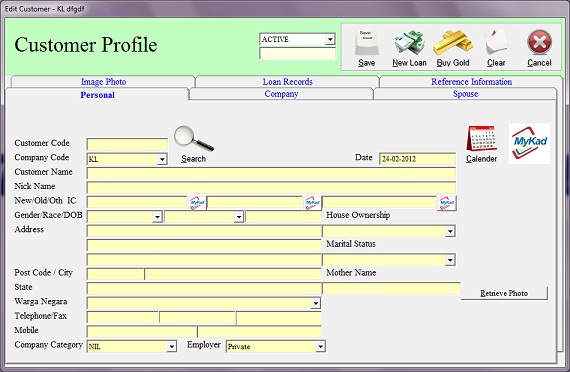
Customer With MyKad
-
Leave the Customer Code in blank.
-
Click
 button.
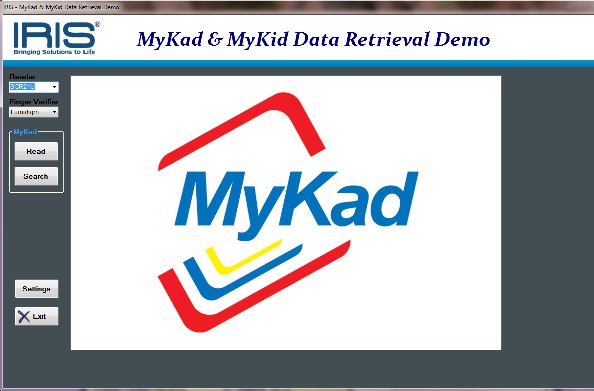
- Click
 button.
- After MyKad information show,
click
 button to exit.
- MyKad record will be fill into the
customer profile.
- Fill in the rest of the field eg.
Contact No, Company, Spouse, Images Photo and Reference if any.
Customer Without MyKad or MyKad
cannot be read
- Manual fill in all customer
particulars eg. Name, New IC no, Old IC No, Address and so on.
- No MyKad photo will be extract,
user to manual scan the MyKad and add into Image Photo.
Saving Customer Profiles
- click
 button to save customer profile, customer code will be auto generated.
- Customer Code will be share across
all branches.
Read Existing
Customer Profile
- To read Customer Profile
- You can key in customer New IC
in the Customer Code, customer IC must with -, eg 801201-10-3551.
- You can key in Alternate Code
in the customer Code.
- To Search Customer profile.
- Click
 button.

- Fill in any key words to
search customer profile.
- Key words can be part of the
following field.
a. Customer Name
b. New IC
c. Old IC
d. Other IC
e. Mobile No
- Result Limit defaulted to 20
and can select to 10, 20, 50, 100, 250 & 500, the more limit select may
cause slow loading process.
- Company code to drill down
just for that branch customer profile only.
- Sort Order to select either
sort by customer code or customer name.
- Once confirm then click
 button to get the Customer Code.
- Key in Customer
New IC in the Customer Code will able to see all branches Loan Records.
Image Photo
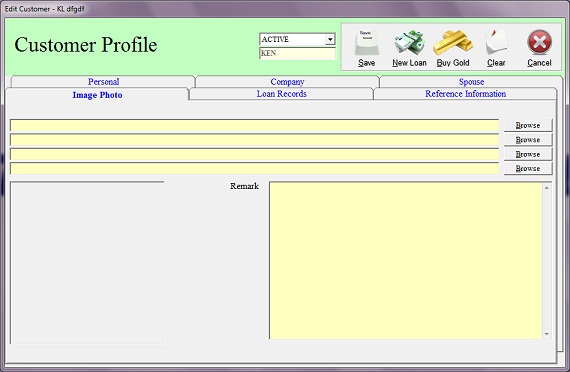
- 4 additional customer photo can be added in here, click
 button to browse the photo at your local drive.
Save Reference Information
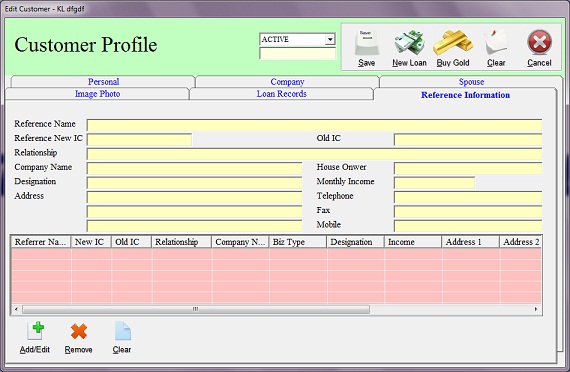
- Retrieve customer profile, go to
Reference Information tab.
- Fill in Reference particulars show
as above image.
- Click
 button to temporary save Reference details into Reference List and ready
for next Reference detail.
button to temporary save Reference details into Reference List and ready
for next Reference detail.
- Click
 button to remove unwanted Reference detail.
- Click
 button to clear Reference detail and ready for next Reference.
- Final
button to save customer profiles otherwise all new added Reference will not
be save into database.
Buy Gold
- Retrieve Customer Profile and click
 button.
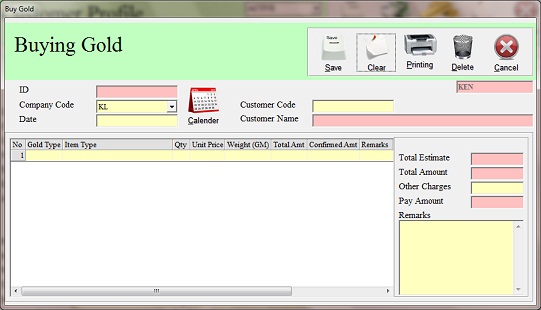
- Customer Code and Customer Name will be
auto fill in.
- Click Gold Type to select from pre-defines gold
type.
- Fill in Item Type, eg Necklace, golden ring, ear
ring, etc.
- Fill in Qty, Unit Price, Weight (GM)
and Total Amt will be calculated automatically.
- Confirmed Amt is the actual buying amount from
customer.
- Fill in Other Charges if any.
- click
button to save to entry.
Check IC
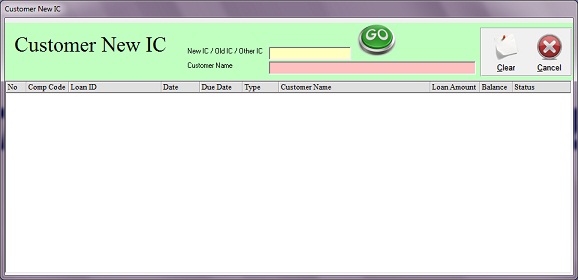
- Key in customer New IC, Old IC or
Other IC.
- Click
 to retrieve customer loan and guarantor information.
- The result will
show in 2 color, yellow color is own loan and pink color is as guarantor.
Add New Loan
- Retrieve Customer Profile and
click
 button.
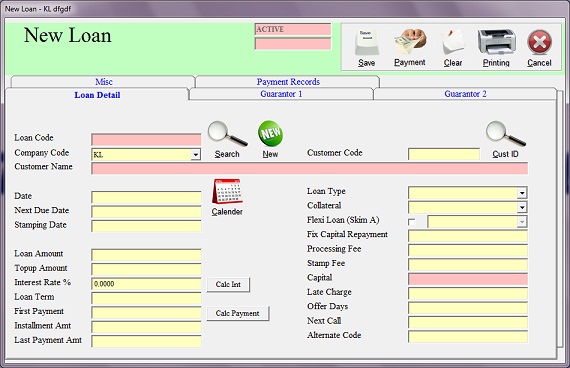
- New Loan screen will be call out, Customer detail will be
auto fill.
- Fill in Loan Date, Loan Type as MONTH and
Next Due Date
will be auto fill in but can change.
- Leave the Stamping Date blank unless you know when you
will stamp the Loan Schedule Agreement.
- Fill Loan Amount, Interest Rate % (per
month) and Loan Term
(number of installment).
- Click
 button to auto calculate the First Payment, Installment Amt
and Last Payment Amt.
button to auto calculate the First Payment, Installment Amt
and Last Payment Amt.
- The First Payment, Installment Amt and
Last Payment Amt can be change, it will reflect the total loan balance,
remember to click
 button to auto count the actual Interest Rate %.
- Capital is the amount that you pay to customer after
deduct the Processing Fee and Stamp Fee.
- Late Charge will be impulse during the payment
when customer pay late by comparing the due date, late charge can be waive
anyway.
- Offer Days is the number of day that you offer to
customer when they pay late, eg Due date is 01-03-2012, offer days is 3, pay
date is 10-03-2012 total late is 9 days but customer entitle 3 days offer
meaning he will be charge late interest at 6 days.
- Next Call is the Follow Up date which to call
customer to chase the payment.
- Alternate Code is your own code which easier for
you to retrieve customer profiles, loan record and making new payment.
- Choose either Secured or Unsecure under Collateral field.
- Flexi Loan (Scheme A) for monthly interest loan,
Loan Term must be in 1 and select Interest Pay First.
- Fix Capital Repayment will show in Payment Screen
to remain to collect the capital payment.
- Guarantor
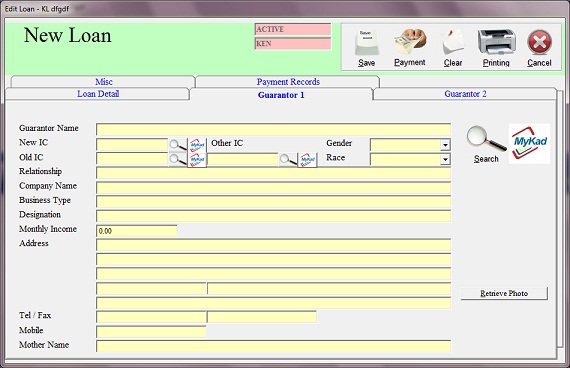
- Several way to input Guarantor detail, use
button to search from existing customer profile, or
- Client
button to read from guarantor MyKad, or
- Fill in guarantor New IC or Old IC or Other IC and
click the
 button to retrieve from previous loan guarantor detail.
- Click
 button to check the guarantor loan history and the loan guaranteed.
- Click
 button to get guarantor's photo from server.
- Misc
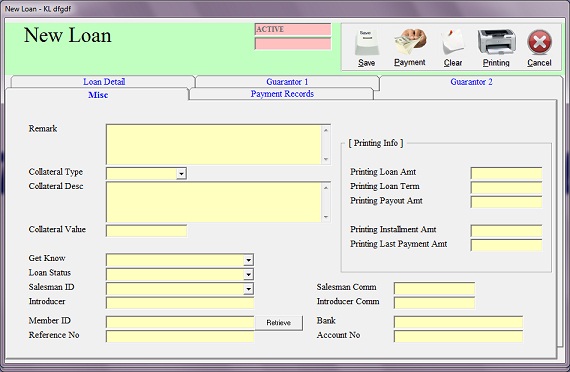
- Collateral Type is compulsory when the loan type
is Secured loan, choose from pre-set collateral type, fill in the
Description and Value, the description and value will be printed
at Schedule K.
- Select the appropriate Loan Status to best
describe the loan behavior, Bad Debt are compulsory to select when
the loan gone to bad debt.
- Member ID, Reference No, Bank and Account No can be
retrieve by click
 the button.
- Printing Info will be print the Schedule J for
unsecure loan or Schedule K for secured loan.
- Click
 button to print loan documents.
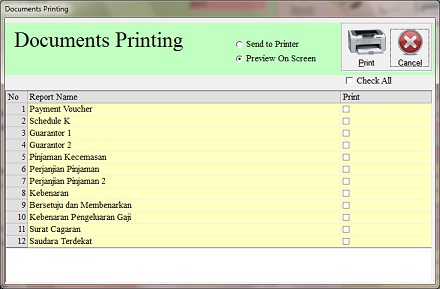
- Select which document to print and click the
 button.
Payment
- Retrieve Loan detail and Click
 button.
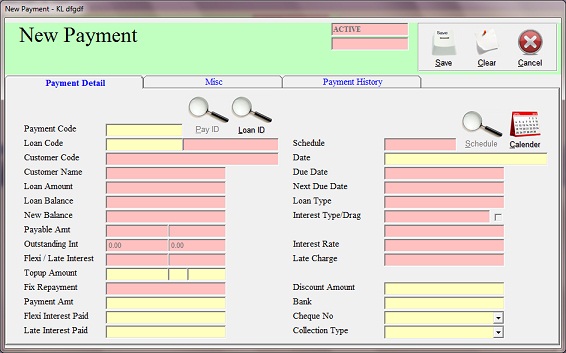
- New screen will show as above image, loan detail will be
auto fill in.
- Fill in Payment Date.
- Fill in Payment Amt for scheme loan or Payment
Amt and Flexi Interest Paid for Scheme A loan.
- System will calculate the Scheme A Flexi Interest in pink
color field and collection at yellow color field, eg system calculate scheme
A interst charge as 90 and collection at 90/
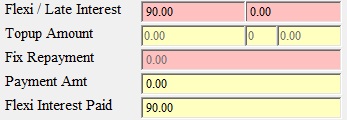
- If the Flexi Interest Paid (yellow color) is less
than the Flexi Interest Charge (pink color), system will keep track
that the loan have outstanding Flexi Interest balance.
-
For loan Early Settlement, fill in the full loan
balance amount and fill in the Discount Amount for settlement, eg
Loan Balance 1000 agree to settle the loan at 800, Payment Amt to put
1000 and Discount Amount to put 200.
- Select
Collection Type as Top Up for Scheme A loan
Top Up, the top up amount will be added into existing loan balance.
-
Topup Amount first column is the amount that you
pay to customer, second column put 1 and third column put what customer will
pay back, eg. customer top up 100 and on hand get 80, fill in as

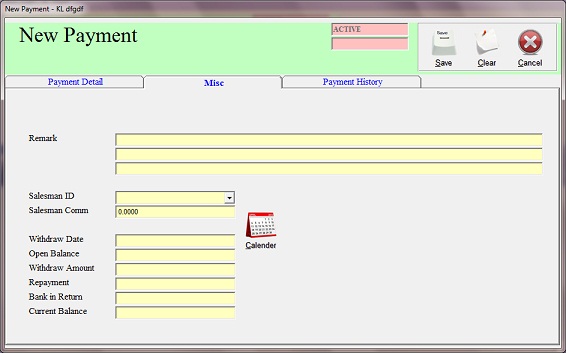
- Fill in Remark if any.
- Click
button to save the payment record.
Follow Up
- Follow Up will show whatever loan on due.
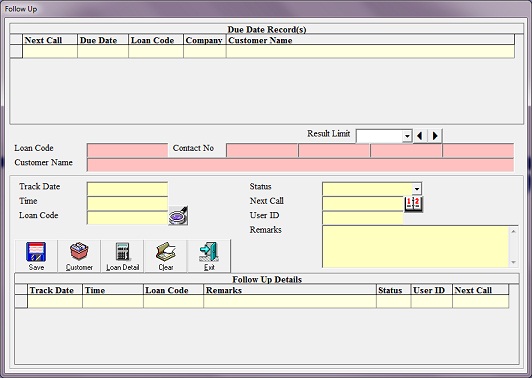
- Double click on the loan list, loan detail in Contact No and Customer
Name will be show.
- Make a call to customer and record the conversation in the Remarks
column.
- Select the pre-define Status for the conversation type.
- Fill in the Next Call date which will be appear back in the list
when the current date are greater or equal to the next call date.
- click
 button to save to entry, the conversion will be store in the bottom list
which can be double click to show up again.
button to save to entry, the conversion will be store in the bottom list
which can be double click to show up again.
- Click
 button to view the customer profile.
- Click
 button to view loan detail.
- New function added to allow user to select Bad
Debt only or all and allow to sort by Next Call, Company Code and Customer
Name
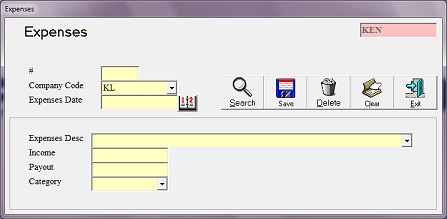
Expenses
- Expenses to record cash
flow in and out others than Loan, Buy Gold, Payment & Sell Gold
- Click
 button to search existing expenses record.
- Fill in Expenses Date.
- Fill in Expenses Description eg. Salary for the
month of 02-2012, Office Rental, Electric Bill, etc.
- Either Income for cash in or Payout for
cash out.
- Select the Category from pre-defined category for
your expenses, eg SALARY, CAPITAL, RENTAL, etc.
- Category can be filter at Expenses Report.
- Click
button to save the entry.
- Click
 button to remove expenses record.
Reporting
- All report having the standard input function
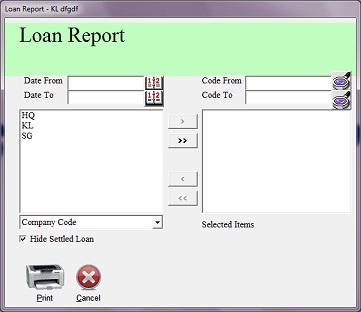
- Date From and Date To allow user to choose
any date range of the report.
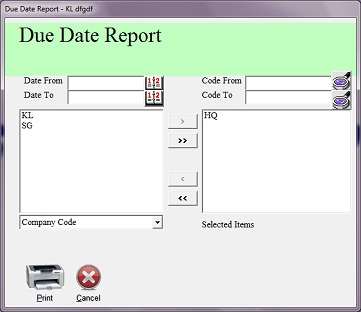
- For Due Date Report the Date From can leave
blank with just Date To to print overall outstanding loan due as at
Date To.
- Code From and Code To will depend report
type, eg. customer profile will be customer code, loan report will be loan
code
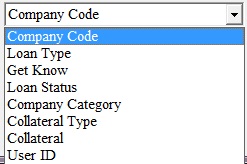
- Further drill down the report by selection items from
pre-define selection eg company code, loan type, etc.
- Click
 to select single item or
 button to select all items to make selection, eg as below image.
- Click
button to print the report.